My Deep Learning Rig Build Journey...
I’ve been on quite a journey planning and building my own deep learning machine. I wanted to share my thought process, the decisions I made along the way, and my final setup. Hopefully, this can help anyone else considering a similar project!
Why Build Your Own Deep Learning Rig?
Let me quickly recap why I decided to build my own machine:
- It’s a fun challenge and learning experience.
- As a data scientist/engineer, I wanted to understand the hardware better.
- It’s cost-effective in the long run if you use it frequently.
- Flexibility: I can use it for deep learning, gaming, and even as a personal cloud.
Key Decisions Based on Research
I spent a lot of time researching and reading articles about building deep learning rigs. One particularly helpful resource was Tim Dettmers’ blog post on deep learning hardware. Here are some key decisions I made based on that research:
1. GPU Choice
This was probably the most crucial decision. I went with an RTX 3090, even though it’s not the latest model. Why?
- Great balance of performance and cost
- 24GB of VRAM, which is plenty for most deep learning tasks
- Ability to use 16-bit precision, which effectively doubles the memory
I decided to buy a second-hand 3090 to save some money. It’s a bit risky, but the potential savings were worth it for me.
2. CPU Selection
I chose the Intel Core i7-13700K. For deep learning, you don’t need the absolute top-of-the-line CPU. What mattered more was:
- Having enough cores (1-2 per GPU)
- Clock speed > 2GHz
- Support for the number of GPUs I plan to use
The i7-13700K ticks all these boxes and leaves room for future expansion.
3. RAM Considerations
I went with 64GB of Corsair Vengeance RGB DDR5. The article pointed out that RAM clock speeds don’t matter much for deep learning, but I decided on DDR5 for future-proofing. 64GB should be more than enough to match my GPU’s memory and handle large datasets.
4. Storage Strategy
Following the advice from the article, I’m using a two-pronged approach:
- Samsung 990 Pro 1TB NVMe SSD for the OS and frequently used programs
- Samsung 870 QVO 4TB SSD for datasets and less frequently accessed files
This setup gives me the speed where I need it and plenty of storage for large datasets.
5. Power Supply
I chose the EVGA 1300 G+. The article stressed the importance of having enough power and PCIe connectors. I calculated my power needs and added some buffer, as suggested.
6. Cooling Considerations
For CPU cooling, I went with the DeepCool LE520 Liquid Cooling Kit. For the GPU, I’m sticking with air cooling for now, but I made sure to get a case with good airflow.
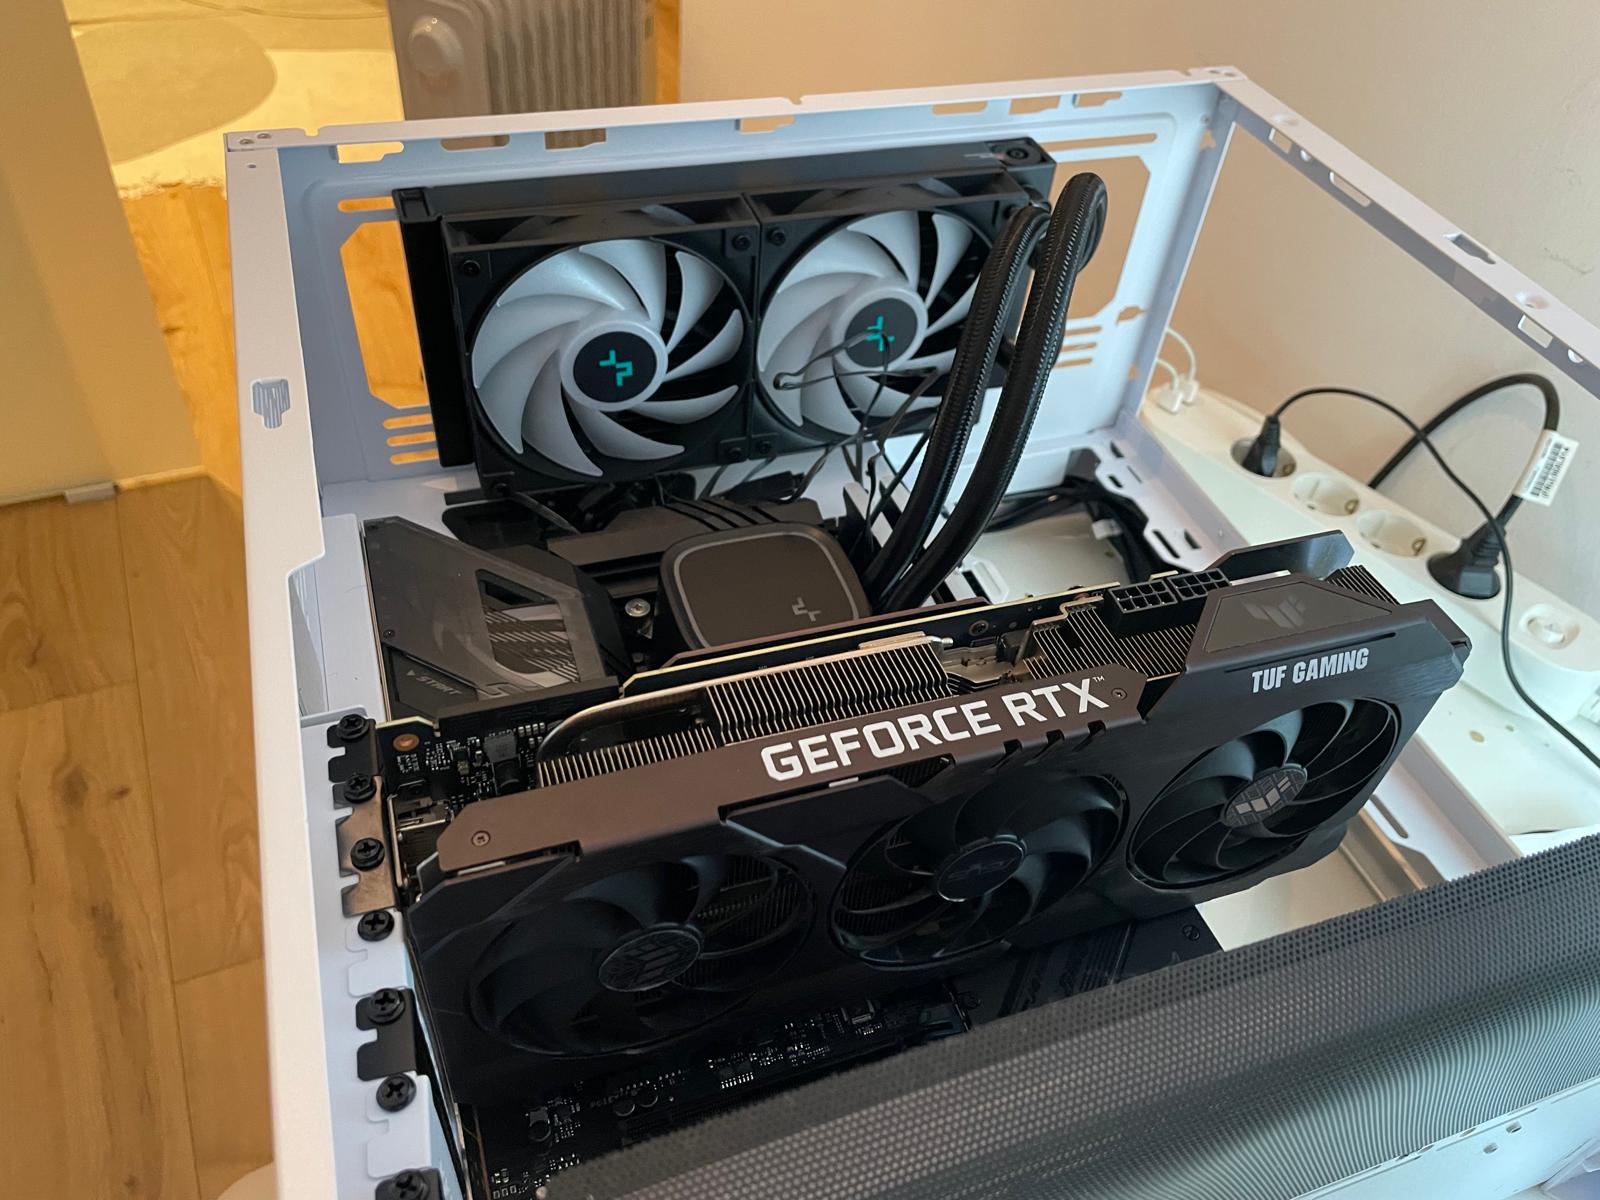
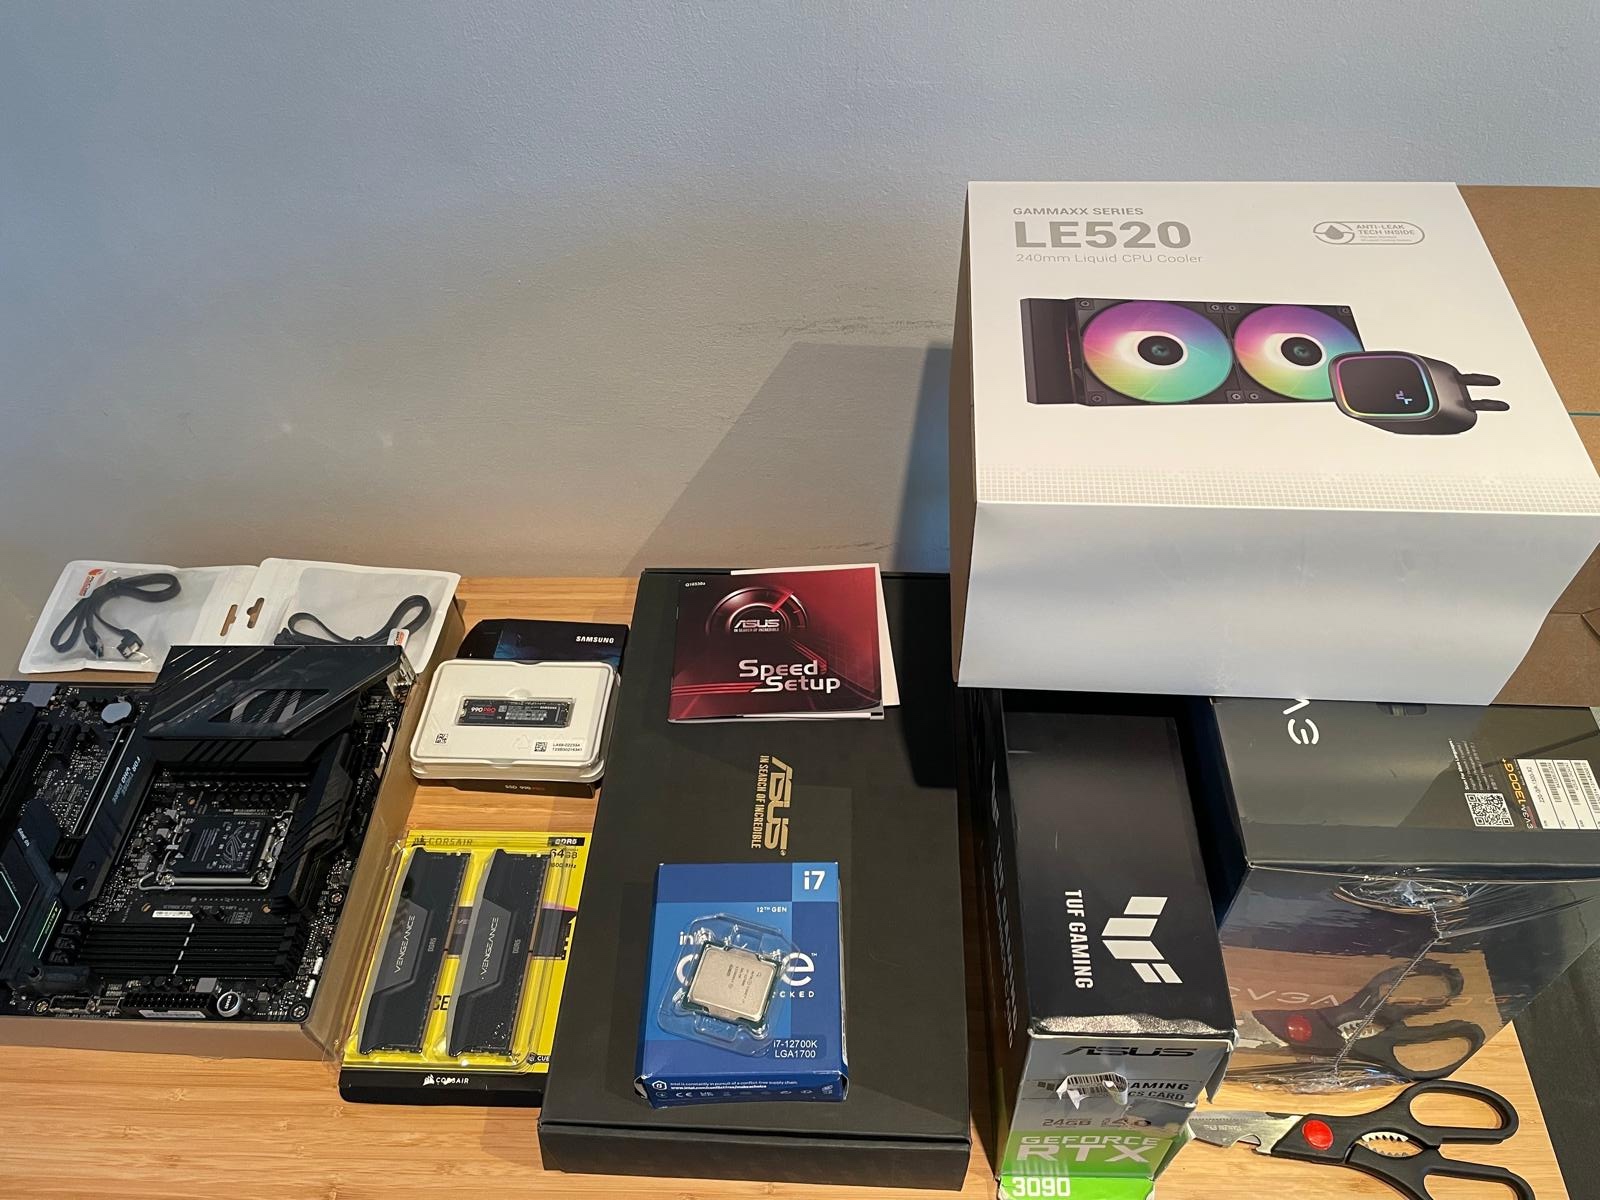
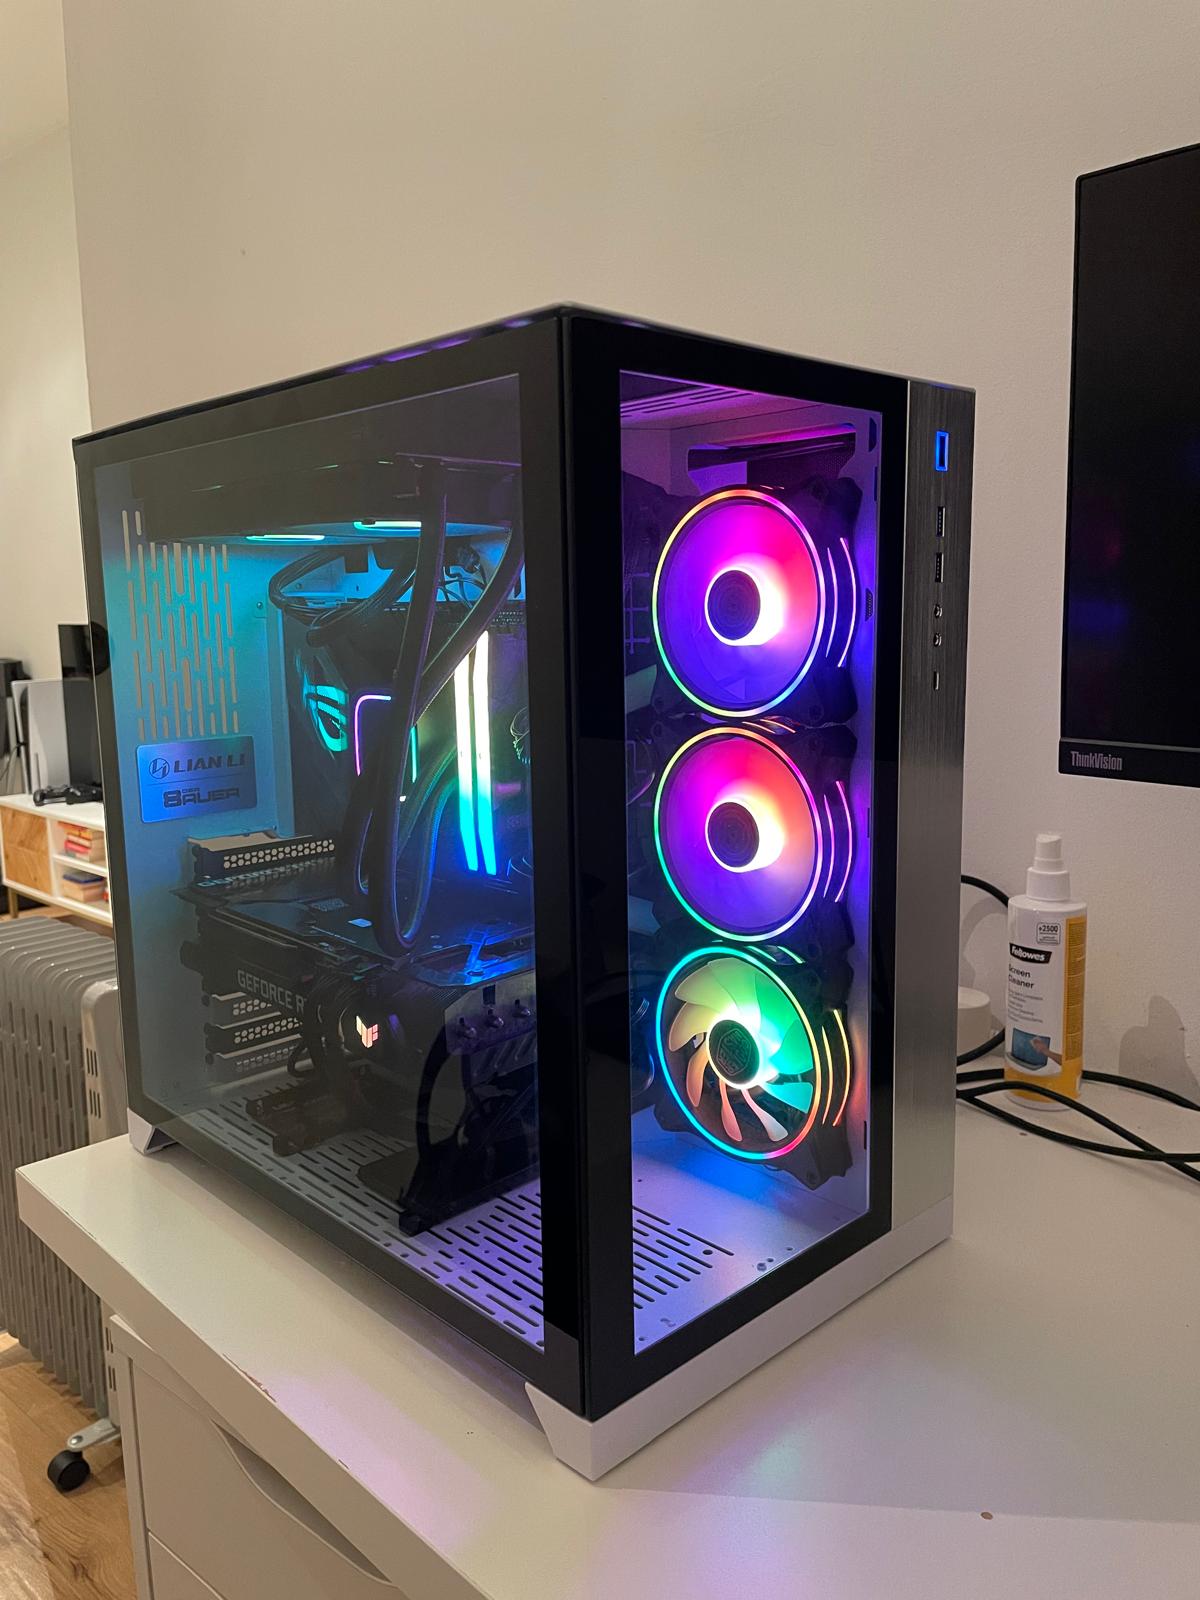
My Final Build
Here’s the complete list of components for my deep learning rig:
- CPU: Intel Core i7-13700K
- GPU: RTX 3090 (second-hand)
- RAM: 64GB Corsair Vengeance RGB DDR5
- Motherboard: ASUS ROG STRIX Z790-F
- Storage:
- Samsung 990 Pro 1TB NVMe SSD (OS and programs)
- Samsung 870 QVO 4TB SSD (datasets)
- Power Supply: EVGA 1300 G+
- Case: Lian Li PC-O11 Dynamic
- CPU Cooling: DeepCool LE520 Liquid Cooling Kit
- Case Fans: Cooler Master MasterFan 3-in-1 MF120 Halo
Building Process and Challenges
Here are some challenges I faced:
- Installing the case fans was more fiddly than I expected.
- Cable management with the power supply took some time to get right.
- I encountered some boot-up issues initially, which took some time to figure out, but with some googling and ChatGPT I was able to solve!
Steps after build is ready
Once the hardware is set up, my next steps are:
- Install Ubuntu (I chose this over Windows for better compatibility with deep learning frameworks)
- Set up CUDA for GPU acceleration
- Mount the second SSD
- Run some benchmarks and tests to ensure everything’s working correctly
Conclusion
Building my own deep learning rig has been an incredible learning experience. It’s given me a much deeper understanding of the hardware that powers the algorithms we work with every day. Plus, I now have a powerful, flexible machine that I can use for all sorts of projects.
If you’re considering building your own deep learning rig, I say go for it! Yes, it takes time and research, but the knowledge you gain and the customized setup you end up with are well worth it.
References
- How does computer hardware work
- PCPartPicker
- Building your own DL machine
- Jeremy Howard on GPU options for LLMs
- Aleksa Gordic, how to build a DL machine
- Tim Dettmers’ Deep Learning Hardware Guide
- Tim Dettmers’ Which GPU for Deep Learning
- Emil Wallner’s ML Rig
- Daniel Bourke’s Notes on Building a Deep Learning PC